Copycat Oreos and Homemade Ravioli

That seems like an odd title for a blog post, don’t you think? I agree. But it just so happens I took some photos of my process for a copycat recipeĀ for Oreos (original, I only adapted slightly, is here). I’ve done it before but I promised the littlest one she could have some “mini” oreos, and definitely did not mean I would be buying some of the “real” (hahahahaha!) kind. I figured I would do a blog post about them. I haven’t blogged something like this is quite a while, so I wanted to do it with a recipe I knew I already loved. I’ve done this recipe before and they are perfect Oreo substitutes. And since Late July stopped making their AMAZING and DELICIOUS “sandwich cookies”, I have not been able to find a comparable (organic) substitute. Until I made this recipe! So, I posted on my FB and my Instagram about them, and that same night I posted a couple photos I took just on my iPhone of the homemade ravioli I made for dinner. People were equally interested in both recipes, so I decided to combine them! I made the Ravioli dough based off of a recipe I found on Pinterest, but it was one of those pins that takes you to ten different sites first, all linking to random crap that eventually links to what you’re looking for…so luckily I took a photo of all the ingredients! So let’s get to it!

Homemade Copycat Oreos:

COOKIES:

1 C. (2 sticks) unsalted butter softened

1 C. granulated sugar

1 egg

1 tsp. pure vanilla extract (I used lavender extract in mine, it was very subtle, I’d up it if using this instead)

2 C. all purpose flour

3/4 C. Dutch Process cocoa powder (make sure it is Dutch Process, otherwise it is simply not the same)

1 1/2 tsp. baking powder

1 tsp. salt

FILLING:

1/2 C. (1 stick) unsalted butter, softened

2 TBS. half and half

1 tsp. pure vanilla extract (I used lavender again)

Pinch of salt

3-3 1/2 C. powdered sugar, sifted


Oreos-14

I like to try and get everything out and ready before I get started so I am not wandering around, usually with dough, flour, sugar, egg whites, all over my hands and leaving little gunky smudges everywhere. The hubby hates that.

Oreos-13

And this time around my littlest one insisted on being “mommy’s little baker helper”, so we had on our matching aprons and when I’m getting the kids to help (especially when the smaller ones are involved) I pre-measure because if they tried to spoon and level, or if I turned around for a second, we would be eating crunchy egg shell, salted all chocolate and powdered sugar (instead of flour) cookies. Obviously it wouldn’t be all that bad…I would still be in the room. But it makes things much easier, and since it was just me and T today I pre-measured everything.

Oreos-12

She nearly missed trying to get the light and watch her angles all while posing with the butter partially dumped. My little ham :0)

Oreos-10

“Mixa-mixa-mixa!” It’s her favorite part!

Oreos-8

T wasn’t my only helper. This little man was prepping for what he thought we should make next ;0)

Oreos-7

I didn’t have a cookie cutter small enough so we just used a piping tip!

Oreos-6

This was so tedious!

Oreos-5

Cousins helping each other out. Taking a snack break! Princess Penelope was eager to help too! (you can follow her and her adventures on Instagram @Princess_penelope_pickle)

Oreos-9

While the cookies were baking I prepped the frosting.

Oreos-4

And when they were all ready and cooled I piped the filling on to a bajillion little halves and topped with the other halves!

Oreos-3

Oreos-2

Oreos

Because I’m not CRAZY (ok, I am…but still) I only did half mini, and the other half regular!

That one on top is the one I sampled ;0)

Directions:

For the cookies, cream the butter and sugar in a large mixing bowl attached to a stand mixer with the beater attachment, beating on medium speed until light and fluffy. Add egg and vanilla beating until incorporated.

While this is running whisk together the dry ingredients. Gradually add this to the creamed mixture, beating on the lowest setting until just incorporated.

Divide dough in half and form two discs. Cover and place in the fridge for an hour.

When chilled preheat oven to 350 degrees F. Line a baking sheet with parchment or baking mat and set aside.

Roll out the dough and cut to size/shape desired. You want them to be about 1/8-1/4 inch thick. Thinner is better. Mine were quite thick. You want them to be crispier. Makes them feel more authentic!

Bake for about 12 minutes and remove to a cooling rack.

Meanwhile prepare the filling.

Combine butter, half and half, extract and salt beating until combined.

Add the powdered sugar 1/2 a cup at a time until it is smooth and all lumps are gone. It should be slightly stiffer than cake frosting.

Transfer to a piping bag and frost half the cookies, and top with the other half! Viola!


Now for the ravioli: (remember this was just random that I took these photos with my iPhone because I kind of take pictures of everything!)


Homemade Ravioli:

1 1/2 C. all purpose flour

2 eggs

1-2 TBS. water

1/2 tsp salt

Ravioli

Ravioli-2

Ravioli-4

Ravioli-5

Directions:

Combine all ingredients. I just used a pastry cutter because I didn’t want to clean out the stand mixer bowl again. I think a fork would work too.

Once the dough forms a ball, you don’t want it to stick to your hands but you don’t want it over mixed either, cover it and let it rest for 30 minutes. Then take it 1/4 at a time and knead it on a lightly floured surface slightly and roll it out to as thin as you can get it, or pass it through a pasta machine. If you have the kitchen aid one I went with a % setting and that was perfect.

Cut out the shapes you would like, and add the filling.Ā  Then seal them using an egg wash. I just did about 2 TBS egg whites and 1 TBS water because I had egg whites left from when I made homemade ice cream the other day.

For the filling I took a few mushrooms and chopped them finely, added the whole tub of ricotta (they’re a pretty average size, right?) and about a cup of grated mozzarella.

Bring a pot of salted water to a boil and drop ravioli in once it is at a good boil.

Cook for about 3-4 minutes, pushing them around to make sure they aren’t sticking.

With a slotted spoon remove the ravioli from the water and place in a bowl to drain.

I made a simple sauce with tomato sauce, chopped onions, crushed garlic and some basil. I heated that on the stove and tossed the ravioli in it when it was hot!

Serve and enjoy!

I froze about half and reheated it a few days later when we had all the girls here. I just stuck the glass dish I froze it in in the oven (cold oven) and heated it at 350 for about an hour. I checked on it about half-way through and covered it with foil for the remainder, mixing it up slightly before putting it back it.

The kids loved it!

I hope that you’ll try these two recipes out at your house, and let me know how it goes!

Enjoy!


Put the Lime in the Coconut EO Party

So! We had a lot of fun the other night at my Lime in the Coconut Party! I did at least! I hope everyone who came and got some info on these amazing oils also enjoyed it! I thought I would share some of the stuff I made to make it extra lime-in-the-coconuty!

LITC Party 1-18

I definitely cut up more than a few limes!

LITC Party 1-17

Now, even though it was meant to be a margarita party as well…everyone just seemed to come for the oils, and we didn’t even fire up the ol’ margaritaville! But everyone did seem to enjoy the lavender lime-ade!

LITC Party 1-21Ā  LITC Party 1-20Ā  LITC Party 1-22

Ā  LITC Party 1-19

While slicing up some limes to put in the jug I decided to give candied limes a shot. I’ve tried candied lemons with pretty much no success a few times…but I have a hard time letting things go…

LITC Party 1-27 LITC Party 1-28

LITC Party 1-29

Now, it did suggest blanching them first…and I probably should have gotten the sugar up to temperature more because it stalled since I kept fiddling with the limes…so yet again it didn’t work. I still used them as decor, you’ll see them in there later. They still tasted super pithy, and the sugar got caramelly without getting to hard crack (which is where I wanted it…) Oh well! Maybe next time ;0)

LITC Party 1-1

Next up on my list was key lime mousse pie with coconut crust! Oh my heavens…good!

LITC Party 1-2

I zested and juiced the limes

LITC Party 1-4

But then I found out I was out of powdered sugar!!

LITC Party 1-6

So I brought out my coffee grinder…

LITC Party 1-7

And my all-too-empty organic cane sugar…

LITC Party 1-8

and viola! Powdered sugar.

LITC Party 1-10

And I’m sharing this picture just to stress, if using corn starch make sure it’s organic…you don’t want those GMOs in your fantastic homemade creations! Also…because it showcases my awesome tidiness skills!

LITC Party 1-11

So this was the lime curd, and on it’s own it was amazing!! But then I folded in whipped cream to make it a “mousse” and…OH…MY…GOODNESS! It was SOOO good!!

LITC Party 1-9

More fun photos of how not messy I am when I’m in the kitchen! Oh wait…that’s not true! And that’s why my hubs needs to stay far away when I’m baking because his OCD makes it impossible for him to not freak out when watching me! :0)

LITC Party 1-25

Toasting the coconut was pretty fun, it needed constant turning, but once it started to brown it was pretty cool to watch the color change so quickly! It’s the little things in life you guys ;0)

LITC Party 1-26

It needed to firm up in the fridge to stick together, but this was a nice crust! Vanilla wafers, toasted shredded coconut, and butter…yummy!

LITC Party 1-12

So whenever I make a curd, or a custard, or anything that calls for egg yolks only, I like to make meringues as well. So I whipped up the egg whites…

LITC Party 1-15

Added some lime zest and coconut shreddings

LITC Party 1-16

And piped some meringues!

Well……I keep seeming to forget that this is not the way meringues work. So these leaked and deflated, and did not work at all. So I looked it up and realized the egg whites needed to be put over the double boiler to get the sugar dissolved into the egg whites first. And because these sill tasted delicious with the lime and coconut, even though they were super ugly, I had to remake them! And they turned out super yummy and crisp, and if anything too inflated! (they cracked)

LITC Party 1-35

Yummy!

LITC Party 1-30

I also made some tortillas because I was going to make fajitas…

LITC Party 1-31 LITC Party 1-32 LITC Party 1-33

And I tried a new mix I found on Pinterest for fajita seasoning. It was good!

LITC Party 1-34

But because people were coming and going all through the night, we really just snacked (sorry sis, I know you left starving! That’s what you get for being first to come and last to leave!) ;0)

LITC Party 1-24 LITC Party 1-23 LITC Party 1-38

I also made these “jello shots” without alcohol (I saved some of the jello and added tequila…it’s still in the fridge, I’ll probably have some this weekend!) I really liked them, but they were a bit sour to suck out of the rind. I like sour…not everyone else does.

LITC Party 1-36 LITC Party 1-39Ā  LITC Party 1-41

I wasn’t super diligent with the photo taking, but here are some highlights…Those cookies, on the bottom of the stand (with the stupid candied limes on top)…the cookies were AMAZING!!! Lime and coconut sugar cookies! (I am a bit of a theme whore…I can’t help myself!)

LITC Party 1-40

This was supposed to have a coconut whipped cream on top…but the coconut milk didn’t separate into the cream, and the milk…so I wasn’t able to whip it. But honestly, it wasn’t even needed, this pie was AMAZE-BALLS!

LITC Party 1-37

Of course I had to have a kit set up to check out! So pretty :0)

LITC Party 1-42

I also put out my loverly new resources. LOVE the desk reference! Don’t get me wrong, the pocket reference is so wonderful, but the desk reference has a lot more information, and I love that it has all the info on all the nutritional supplements at Young Living as well!

LITC Party 1-43

These are some of the things we raffled off! Two diffuser necklaces, a whole goodie basket with lots of awesomeness, a 4 oz tummy tuck cream, a raindrop massage, and then each individual oil from the starter kit! Sometimes I worry I’m too generous ;0)

All-in-all it was a lot of fun for me to talk to a bunch of people about my experience so far with these awesome oils. I am so in love with them and they are so amazing, it was nice to get together and share that with people!

LITC Party 1-44

My beauties…did I mention I’m a little obsessed? ;0)

Next week’s post wont be an oily one, it’ll be the teacher gift baskets I’m working on! Check back, I think they’re going to turn out super cute!


Slique | Young Living

Slique Complete-1

Young Living is an amazing company. They have a ton of integrity, and their commitment to quality just becomes more and more apparent. I mean, I’m a pretty obnoxious consumer. Every time I try something new I need to know as much about that thing as I can. And they don’t only have essential oils. They also have some pretty great products that USE the essential oils. I like that because, let’s be honest, if I can get all the things I want from one single place, I’m a happy momma. (Check out this post, or this one to read more about my obsession with one-stop-shopping!) So it’s good that they have amazing customer service that puts up with my constant calls, emails, and live chats! Want an idea of what I’m talking about? One response I got was: “We were able to verify that the vanilla and cream flavoring in our Balance Complete is not derived from the anal glands of a beaver.” Yeah, I went there. I ask those sorts of questions. I read each and every ingredient and then double check if there is any suspicion. If you don’t know why I even asked that question, check out FoodBabe.com and search Beaver Butt! ;0)

So, I was trying out the “weightloss trio” (Lemon, Peppermint, and Grapefruit EOs in a capsule, taken internally) and even though it did some great things, like making me more regular (TMI, I know, but I have an issue with this, sorry!) BUT! Unfortunately I’m not a fan of peppermint. It makes me feel a little woozy. You’ve got to listen to your body when you use ANY product, of ANY kind. That’s my opinion, and my body doesn’t dig peppermint. So I had heard a bit about the Slique oil. Well, I thought I would give it a try, and when I ordered it it came with a little booklet that outlined all the other Slique products.

I was intrigued. I got them all…except the gum. I don’t chew gum. Since starting my journey to an organic lifestyle, it was one thing that was just a frivolous item I didn’t bother finding an organic option for.

I’m going to go through each item, what I liked, what I didn’t and why!

Slique Complete-2

I’m starting here because I have tried SO MANY different “protein powders” or “meal replacement” drinks, powders, whatever. I like this one. It’s vanilla, which I prefer A LOT over chocolate. But honestly, add a bit of coco powder if you like a chocolatey shake. So, as I said, I’ve tried quite a few of these. But this one has something extra: Essential Oils. Right there in it. Fantastic. It’s not only a meal replacement shake, but also a detoxing one. It’s packed with fiber, protein, and tons of fantastic super-food power! When only in water it is a little powdery tasting, and if you’re going to add it to skin milk, then don’t bother, tastes the same as in water. But if you get whole raw milk like I do…yummy! My favorite way to have it is in a smoothie though. Fantabulous. I did the two-scoop thing for two meals out of the day and it was satisfying. It wasn’t very hard to do. Lately I’ve just been putting one tablespoon in my smoothie to give it a little boost.Ā  I’ll explain more on that at the end when I recap the whole system.

Slique Complete-5

Ok. I should have started here, since this is what started it all…I don’t like this stuff. It has stevia in it. I hate stevia. It’s gross, bitter, and NOT sweet! It tastes like an artificial sweetener even though it’s naturally derived. The blend has potential if it weren’t for that, for me. It has citrus EOs and vanilla! Yum…but the stevia is over powering. And I don’t like it. It’s suggested as a way to flavor water so you avoid soft drinks, or stupid water flavoring crap. Sorry, but I’ve never been much for those anyway. And I haven’t had soda in over two years (except a rare Virgil’s Cream Soda…yummy! Or some homemade Ginger Ale). I like water. Water is fantastic, especially when it’s cold, and I’m thirsty. Mmmmm, water. So, this stuff is not really designed for people like me. If you do like stevia, or drink too many sugary drinks, then I would suggest this stuff. But I don’t. I added some to my smoothies…it wasn’t horrible that way. But straight in water? Ew. Makes you wonder why I bothered with the rest of it…I did a little research, and aside from the gum I didn’t bother with I couldn’t see the rest being similar in taste.

Slique Complete-3

Tea. Ew. I hate tea. No joke, if you know me, you know I hate tea. I have tried and tried and tried to like tea because of the positive benefits it can have…but, alas…I don’t like the stuff. I can handle Dandelion tea. It’s ok. I’ll drink it when I feel extra bloated, but not really interested any other time. So I got this mostly for my hubby who likes tea. He’s English. He likes a black tea unsweetened with a spot of milk. This is the crazy part: I really like this tea! And he does not! Whoa. So weird. So the first time I tried it I was like “hmmm…not bad, really not bad.” it was very weird. And I’ve continued to drink it, and I really actually like it! And add a little milk and it’s even better! And my weirdo two-year-old loves the stuff too! So crazy. It blew me away! I also added a couple drops of the Slique Essence to the tea (they suggest it), and it wasn’t as good, but still wasn’t that bad. Weird. Because I also hate the Slique Essence. Just goes to show, you should always try something at least once. And don’t give up if you don’t like something the first time. I even tried Quinoa again this past weekend. It was horrid…but I tried it just in case.Ā  I want to like healthy stuff…I do try! :0P

Slique Complete-4

Ok, I don’t take pills. I don’t even take birth control pills (I use the Nuva Ring…can’t wait for the hubs to get the snip so I can be off BC permanently!). But, I tried these. Here’s what happened…gas. Lots of it. And very regular…movements ;0P I would feel super bloated after taking them…but then after…it did it’s work, I felt completely empty. But in a good way. In that way where you feel like your insides got a detailing and now are all sparkly and clean! So…I don’t like them, but they’re awesome? Does that make sense? Worth it? I think so. For the “long run”. And if you’re putting good stuff back in your body after I think that “clean” feeling will last!


Slique Complete-6

LOVE. Love this stuff. I like how it tastes, it’s got all the goods, I have nothing negative to say about this stuff. Trust me and don’t go for the 2-pack. Get the discounted price for buying more, because you’re going to go through it. The extra bottles can stay in your spare fridge (no spare fridge? get one?) ;0P I take a shot in the morning and evening, and I throw some in smoothies. It’s good stuff. Scratch getting just the bottles, they have a pack that has bottles AND the little single serve packs! I think I need to go change my order! ;0) I’d love to have a packet in the purse for those moments you just need a pick me up…but I actually have an option for that:

Slique Complete-8

These puppies are not in the “Slique Complete” kit. But I swear to you, you need them. For any type of “diet” (as in the things you eat, not the tings you don’t). I have at least one in my purse at all times. I have this issue where I forget to eat…a lot of the time. And then my blood sugar drops suddenly, and I’m cranky, and mean, and snippy with the kids, and I get shaky and short of breath, and feel awful. But when I have those moments when I’ve forgotten, and I’m out and about, on errands, or doing pick ups, I just open one of these up and down it, and it does the trick! It gives me an energy boost, makes the shakes go away, I can breath, and feel less stressed. So especially when you’re trying something new, which for me means some slip ups, and forgetfulness, you need these!

And one thing not pictured is the Slique Bars. Because those are amaze-balls and they got eaten long before I decided to take some picture for you all! There is one in the top photo, but that was probably eaten right after ;0) I love them. They taste good, they are packed with fantastic ingredients, the kids like them too…as if I’d let their greedy little paws on my Slique Bars!! ;0) Sadly they are out of stock right now! |:’o( I’ll have to keep checking back and get loads! So you better get some if you see them in stock! I just ordered some “Wolfberry Crisp” which is apparently a different bar with some other great stuff. I’ll let you all know when I try them! But the bars are a great way to get your snacks in. I think having regular light meals, with even lighter snacks in between are a great way to keep up with your health and weight-loss goals.


Overall-

There was a “Slique in 60” challenge. I failed. I was nowhere near consistent enough, and after only two weeks went on a trip to New York and I don’t do well with schedules when things change (if ever really). Did I lose weight doing this “program”? No. But I also did not add any exercise to it. And when we had our meals they could have been better. And it was only two weeks…BUT I felt slimmer. I felt less bloated, I was regular, and had more energy and just an overall sense of better-ness. I’ve continued with the powder (I just add a tablespoon to smoothies), the ningxia, I LOVE the bars when I’m not out of them, and I drink the tea. I’ve also started a great work-out program and now I have lost weight and feel better than I have in the past when losing weight by crash diets and fad crap. So I would suggest trying it out. That’s the best I can give you. If you were hoping for miracle results…well, I’ll let you know in the next month and a half when I’ve been doing it along with some exercise and consistent improved dietary changes! We shall see! ;0)

Have any of you tried any of the Slique products? What were your impressions? I’d love to hear!

And if you haven’t already, to get started with Young Living and all their wonderful products start here.

Slique Complete-7

What’s this? I just had to share. While I was distracted taking pictures to share on the post today, my little one took advantage and opened up some cereal and since she couldn’t find a bowl, she used a lunch box. And emptied the entire bag. And was closing it up to take on the road. The adorable little stinker! ;0) I thought it was hilarious, so since I had the camera out I figured I’d share it with you all!


Carrot Seed Essential Oil | Avocado Oil | Sunscreen

Carrot seed sunscreen

The summer is fast approaching, and here in sunny SoCal it can get quite hot, and the sun can burn down. Literally. BURN! I have very fair skin, so even though I do tan, I tend to burn first. And burns aren’t fun. But, neither are the toxic chemicals in most conventional sunscreens. I’ve been using a good one, had a good rating as far as “all-natural” is concerned…but it had zinc-oxide in it. Now, don’t get me wrong…I haven’t done all the research, and it does seem that zinc-oxide is a very wonderful sun-protection agent…but it’s got a couple red-flags. I have done a little researching on it…but only enough to make me curious for other options. I’m not trying to tell anyone to get rid of their all-natural sunscreen because of this ingredient. No. Just saying, I was looking for a different option. And I found one!

Let’s meet our ingredients:

Carrot seed sunscreen-7

Avocado Oil:

Carrot seed sunscreen-4

This oil has an SPF of about 4-15, all by it’s lonesome. So that it why I chose this particular oil for my recipe.

Coconut Oil:

Carrot seed sunscreen-5

Also boasts an SPF of about 2-8, and with it’s thicker consistency and great skin benefits, it was a shoe in for the part.

Vitamin E Oil:

Carrot seed sunscreen-3

Great for skin. ‘Nuf said. (note: if you have read this tutorial you might notice this is a different Vitamin E oil to the one I used over there. Whole Foods was out of the other one, and I’m glad for it…you’ll see why later!)

Aloe Vera

Carrot seed sunscreen-6

Skin soothing, all around wonderful for the skin, and if it’s great after a burn, why not before? Hey…I’m just making this stuff up as I go along. If you’re looking for all the knowledgey stuff…you ain’t getting it here! (See how I did that…I said “knowledgey” and “ain’t” to prove my point) ;0)

Carrot Seed Essential Oil:

Carrot seed sunscreen-2

This little powerhouse packs a whopping 38-40 SPF! Obvious choice!

Now I don’t know how the SPF stuff works…does it then get added all together? No clue. But since I all too often go out in the sun with nothing, I’m going to assume no matter how the SPFs get split up in this bad-boy I’ll be good to go. If you’re worried, Google is a magical thing. I’m sure it can be figured out.

So here is the recipe I used. (You’ll notice its a very small amount…I read another recipe that said 20 drops carrot seed to 1/4 cup coconut oil…and I didn’t want to skimp on the carrot seed in my usual “big batch” of lotion…but I didn’t want to use the whole thing up in one go either!)


2 Tbs Avocado oil

1 Tbs Coconut oil

1 tsp Vitamin E oil

1 Tbs Aloe Vera

1 Tbs Water

20 drops Carrot Seed essential oil

The process is similar to other lotion processes, only much less complicated. You want to get the oils melted first, I just popped them in the microwave for a few second intervals until the coconut oil was melted. Not long. Then I put them in the food processor…but I highly suggest just using a blender…small amounts here…I’m just so used to doing it that way, I wasn’t thinking. So blend it to incorporate, then add the aloe and water. Then add the carrot seed EO. Transfer to your choice of container!

That’s it! It won’t set up like other lotion recipes, but I wanted to be able to put it in this:

Carrot seed sunscreen-8

See? I told you I was glad Whole Foods was out of the Vitamin E oil I usually get! This stuff came in a glass roller top bottle that was just the right size!

Carrot seed sunscreen-1

It made just enough for two of them, and there was a little left. I knew it was pretty fluid so I tried it out in a spray bottle (helpful when you have squirmy kids) and it worked great! So stoked about it all.

The reason I decided to do the lotion this way, leave out any real emulsifiers, is because this is coming with me out in the heat…it would likely melt anyway. I could get creative and try different things, but this was simple and its got at least a 38 SPF. Perfect.

So slather it on and go to the beach! Woo-hoo! Keep in mind it’s probably going to need reapplying just like any sunscreen might, but feel free to let me know how it’s worked for you! So far the sun has been coming and going, but I’ll be trying this out soon!

Sunscreen FLYER

To order your Young Living essential oils stop by here.


Tummy Tuck Cream

Hello all! I’ve finally moved this recipe for Tummy Tuck Cream where it belongs! On my new blog geared toward Essential Oils…and maybe some craftsy tutorials here and then when I feel like it! There’s a graphic at the bottom that is new, check it out!


Only a couple of days ago I posted this photo on my FaceBook page, and on a group page I am a part of where I can discuss and learn about the essential oils I’ve been learning about and using for a couple months now, and the response was overwhelming! Here’s the super embarrassing photo I would have taken on a real camera and in similar lighting had I known anyone else would be seeing it!

Tummy before and after

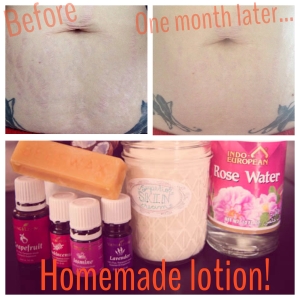
Oy! Look at that! Gross. I know. Makes me cringe. Both do really, but the difference is incredible. You can’t even tell as well with these photos. The lighting is off, the color is different because it is different times of day, the tattoos look different (that caused a lot of people to freak out!). But the things to know about the results I’ve had are as follows:
My skin looks tighter. The puckering at the bottom of my stomach had decreased A LOT, the sagging above my bellybutton is a decreased as well. The COLOR of my stretch marks (in person more so than these photos) is no longer purple and pink but pink and white/shiny. They aren’t vanished, but they do FEEL smoother. My husband (after all the uproar my photo caused!) said “show my your stomach”. I obliged. And he investigated, he felt the skin and really looked up close. Now, he’s been “noticing” the difference over the last couple months (those pictures are a month apart, I’ve been using the lotion off and on for two months) but to him, my stomach is my stomach and he doesn’t notice the stretch marks whether they are purple, pink, or lime green. (they’ve never been lime green, but you get the point.) So it wasn’t until he saw the picture and compared to the “now” in person that he really noticed how much it’s improved. Don’t get me wrong, it’s not like he doesn’t realize I have stretch marks, or that my skin sags drastically if he should see that region when I lean over (ha! Like I let him see “that region” when I lean over!).
Anyhow. That’s just a little bit of an explanation of that photo. It’s not great quality, but it does get the point across. I took them for myself so I would know if I was just seeing what I wanted to see, and so if there was improvement that I just couldn’t see because anything other than COMPLETE DISAPPEARANCE wouldn’t be enough for me. Well, turns out the little improvements here and there are such a beacon of hope, and I am starting to think I wont have to put myself through the emotional upheaval that I have been considering when considering a tummy tuck (hence my name for it!). I was convinced nothing was going to help. I eat well, I eat clean, sure, I don’t exercise currently/regularly, but I have in the past with no results in this department. So I am hopeful, and I will definitely post updates should there be any. I hope there are many!
I just touched on it, and before I get started on the actual tutorial itself I want to address some questions I’ve gotten:
-Currently I am not “on a diet”, I eat organically almost exclusively, save the occasional dinner out.
-Aside from housework and running after kids my exercise is pretty limited to the occasional kick backs, or squats while cooking. I know adding more of this will help my long term health/wellness…I’m a busy momma, I do what I can.
– The tattoos on my stomach have not faded. They have stretch marks streaking through them and the ink interrupted by these scars is discolored and, well…ruined, but the cream has not faded the ink, in fact my skin rarely sees the sun so they’re as dark as my various others still. It’s a crappy iPhone selfie of my stomach that I never thought anyone would see, what else can I say? Hindsight is 20/20 people. Try and look past that.
– I have given birth to two beautiful daughters, and have a beautiful step daughter as well. My first pregnancy was 7 and a half years ago and all the stretch marks seen happened in the last two weeks of it. I only gained 35 pounds and after she was born (exactly on her due date), it took me 2 years to lose the weight and another 2 years to reach my goal weight (an additional 15 lbs). At this point (4 years later) my stretch marks were significantly faded and my skin was wrinkly when bent over, but didn’t sag…much…if I sucked it. A short time later I got pregnant with my second. Long story short, 70 pounds later my stomach was stretched to capacity with my nearly 9 lb baby, I wasn’t eating well because I was throwing up all the time and could barely walk from the pain. My second little bundle came a couple days early, but my stretch marks had been deep purple since I first showed. They didn’t “grow” a lot, but they did grow a little, the worst was the decrease in elasticity. Again, it took 2 years to lose the weight though I have fluctuated between a ten pound threshold (unfortunately I’m currently in the upper portion) and have hoped to make a new “goal weight”, but the color and elasticity only changed in small degrees as the weight came off and it has not improved nearly as much as after the first little one (doesn’t matter how much sucking in I do the sagging can’t be hidden).
Ok, I think I’ve covered most of the questions regarding the photo, and my stretch mark history, so are we ready for the tutorial?!?

First things first, you will need to put together the following:
Tummy Tuck Lotion Tut-3
Extra Virgin Olive Oil (EVOO, thanks Rachel Ray)
Coconut oil (CO)
Vitamin E oil (optional)
Beeswax (for a vegan option I would try carnuba wax…maybe)
Rose water (and or just plain water)
Frankincense Essential Oil (EO)
Lavender Essential Oil
Grapefruit Essential Oil
Geranium (or jasmine, which is more expensive) Essential Oil
A food processor
A double boiler (or just a pot and a glass bowl)
Measuring cups
A spatula
A grater of some sort (unless you use bees wax pastilles which for some reason I didn’t…cost? Don’t know, do what works for you!)
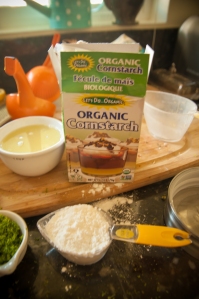
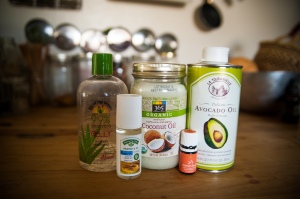
Let’s meet our ingredients and supplies!
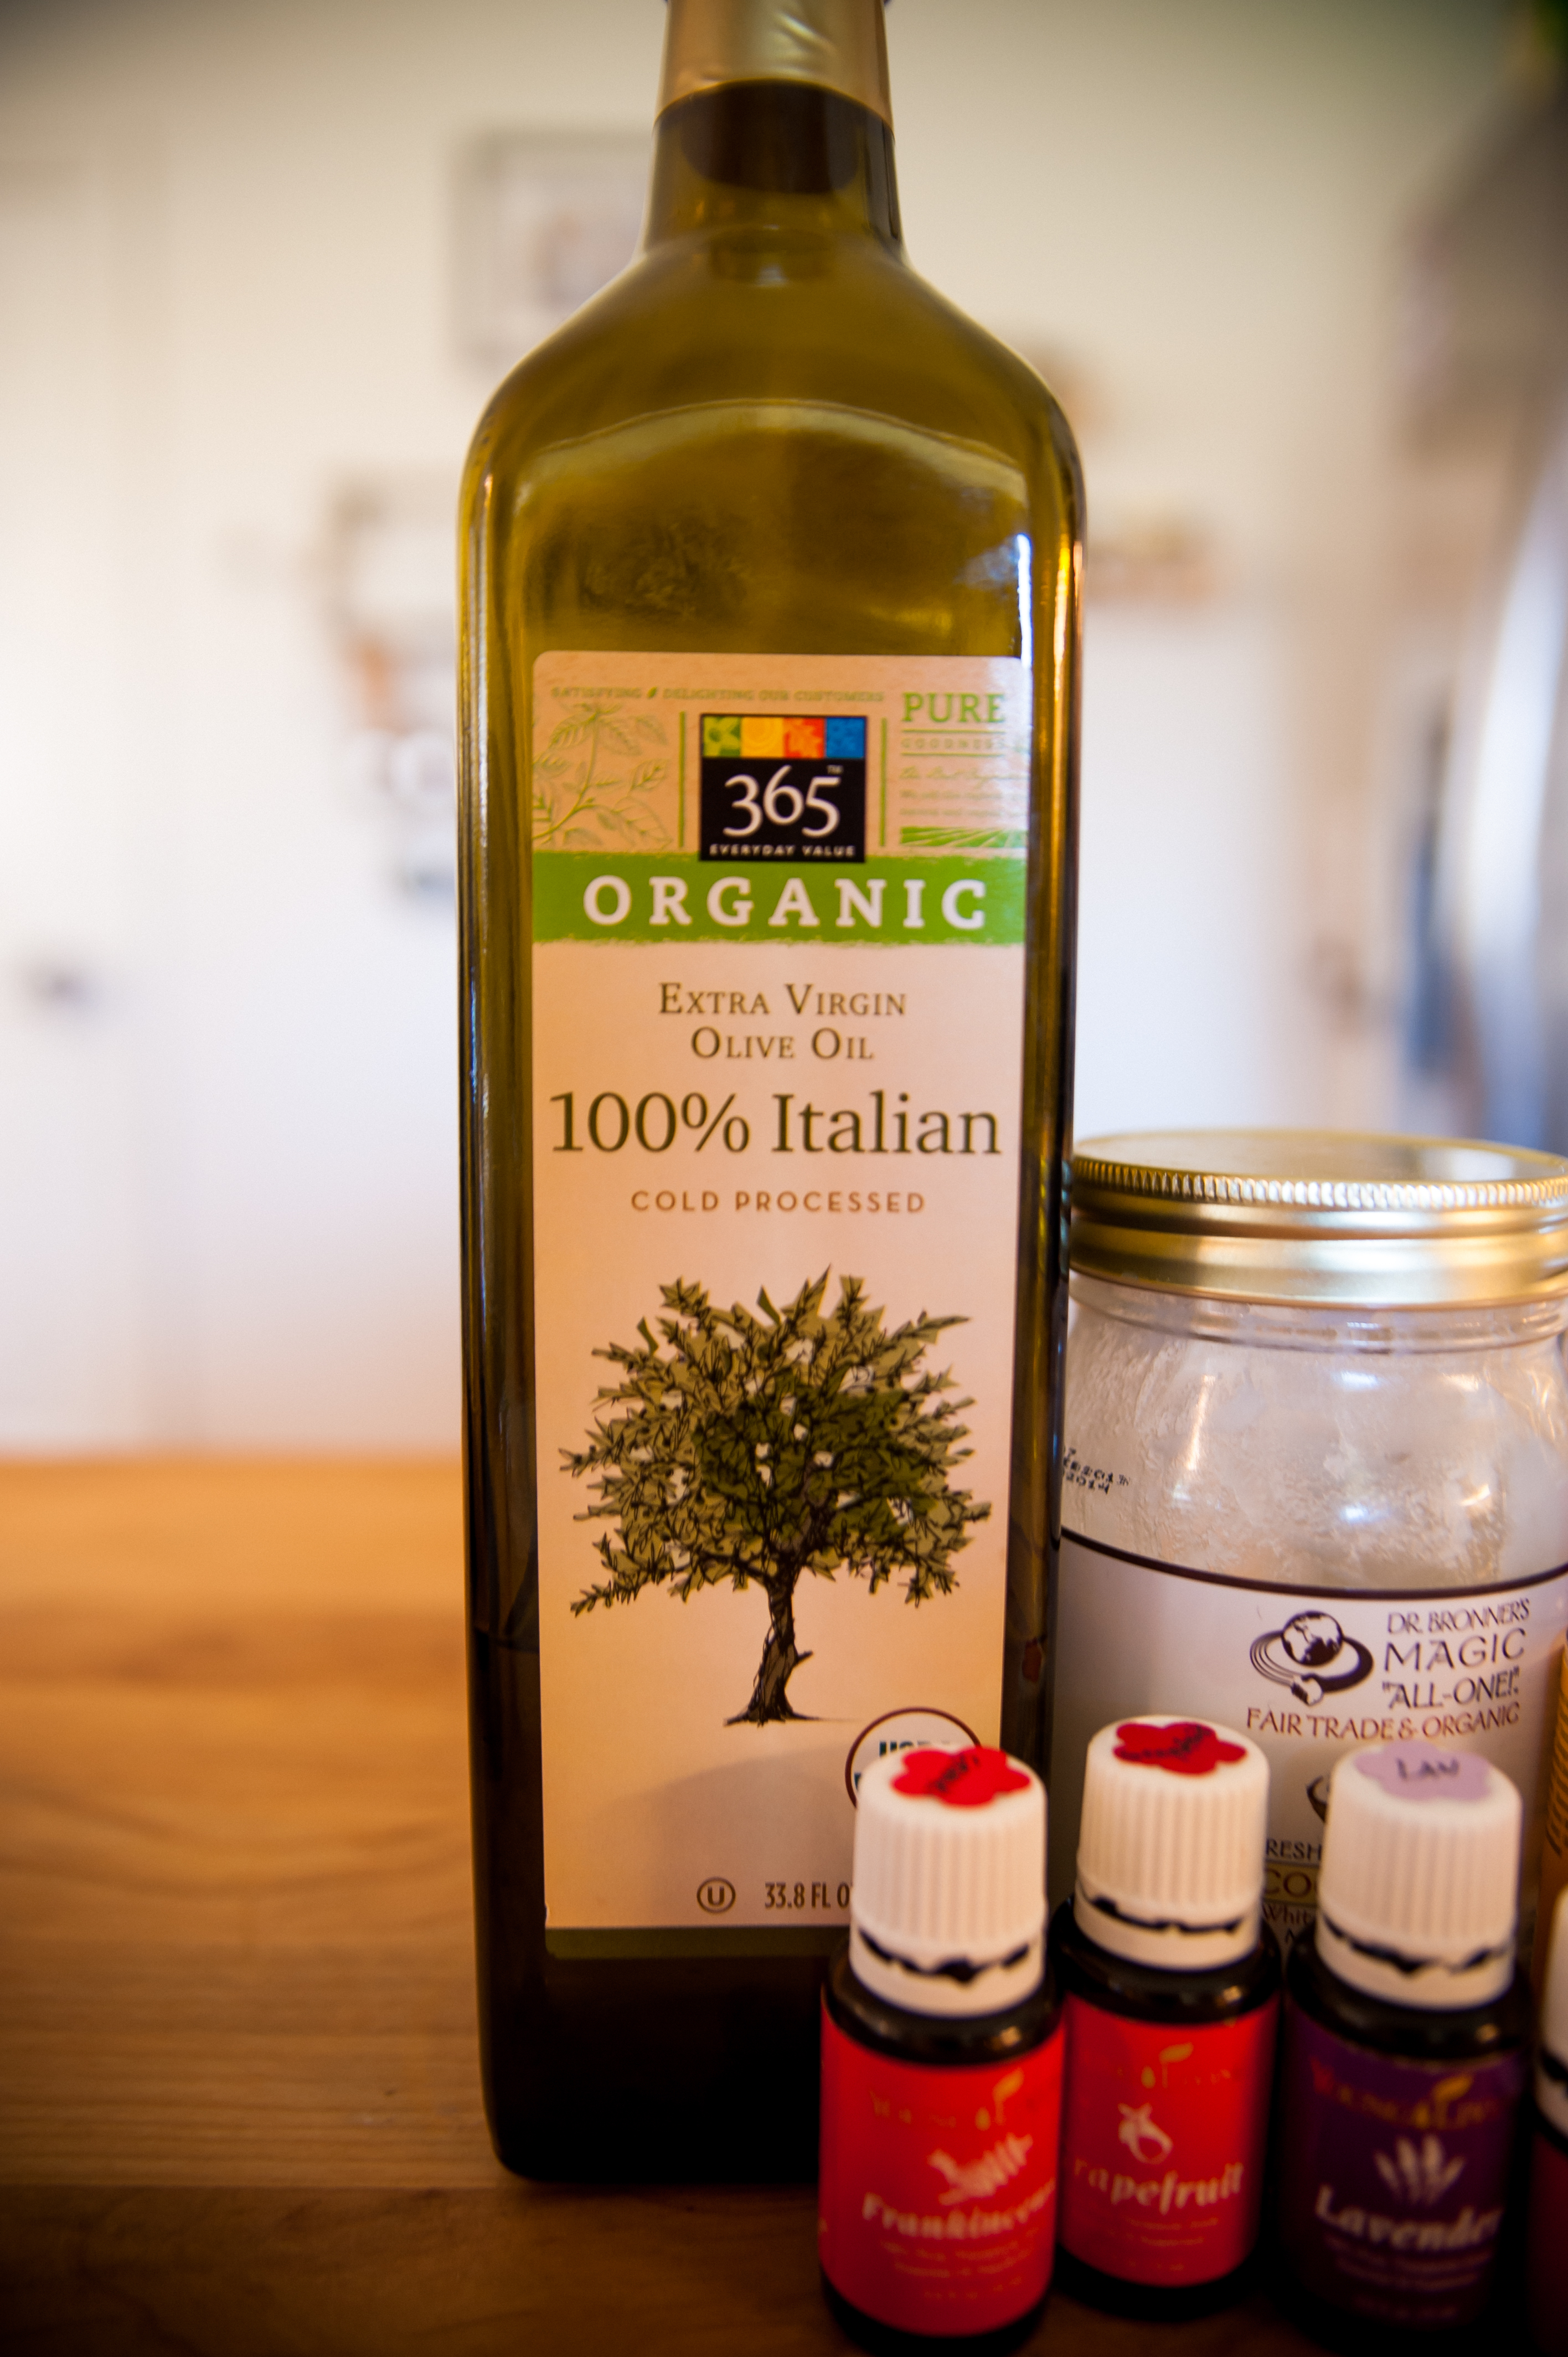
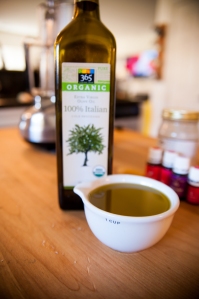
EVOO
Tummy Tuck Lotion Tut-6
I get mine at Whole Foods, their own brand extra virgin, cold pressed, unrefined, organic, all the good stuff. You want to get the best one you can find, the most appropriate with the most beneficial factors. Don’t go wasting a good thing by using lesser products. I still got a less expensive product, but it had everything I wanted from it. We use a different brand for food because we like the taste better. I’m not an expert in oils, so if you know what’s up then go with what you like best!
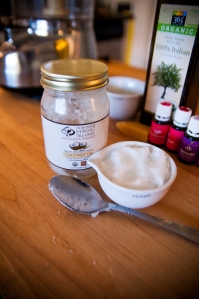
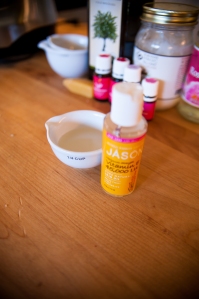
Coconut Oil
Tummy Tuck Lotion Tut-8
Again, got it at Whole Foods. Can you find a less expensive one somewhere else, sure, but I like this one and I’m always at Whole Foods so I save time and money not making a thousand trips, and no shipping costs.Ā  Again, important that it is organic, unrefined, cold pressed…and all that jazz!
Vitamin E Oil
Tummy Tuck Lotion Tut-11
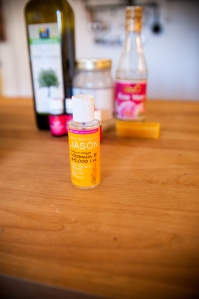
This…guess where I got it! Yup, Whole Foods! They should be paying me for this advertisement, how do I make that happen?? I’ll be happy with store credit and coupons! ;0) I added this in to my most recent batch because of it being renowned for it’s skin healing properties. It can be pricey so feel free to leave it out. I’ve had great results without it too.
Beeswax
Tummy Tuck Lotion Tut-10
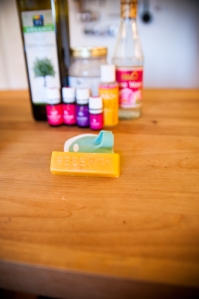
Pretty sure I got it in this form because of the cost and it’s orgsnic, humane, all the good stuffs…but pastilles are available in all sorts. I don’t know what is done that makes some white…but I worry about bleaching, or chemicals so without taking time to look into it, I’m happy to just get these. Like I mentioned above you could try carnuba wax if you are vegan, but I can’t vouch for its effectiveness, only thing I know is it a more brittle wax, but used in cosmetics I know.
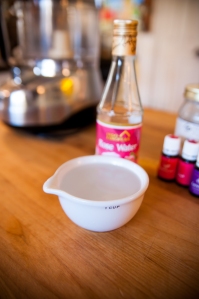
Rose Water
Tummy Tuck Lotion Tut-9
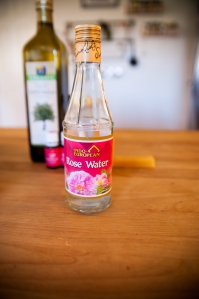
Yes! Ok…I love me my Whole Foods. They have it all. And that’s where I got this one, but I have seen it other places. We have a Valley Produce and I’ve gotten it there before, I think you would find it at an Asian Market. It too isn’t cheap, or free like regular water so leave it out if you need to, but if you want your skin feeling soft as rose petals you might want to leave it in. Totally your call.
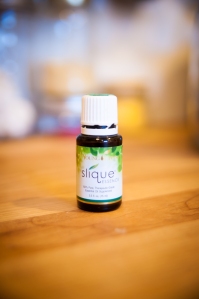
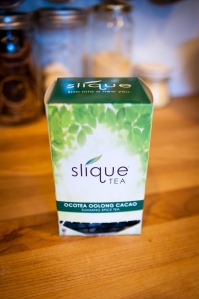
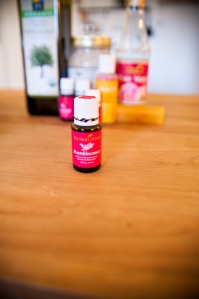
Now for the essential oils. Disclaimer: I’ve done some research and in my personal opinion Young Living essential oils are the best out there. For many a reason and if you want me to go into that I’m glad to…at another time. For now I will just mention this is what I use, it’s what my results resulted from (ew, that was some awkward repetition!). In light of full disclosure I will say, in order to buy them wholesale I became a distributor, but don’t think I’m trying to sell them to you. You could try other companies…but as far as I’m concerned don’t come crying to me when you don’t see any results! But do your own research and make up your own mind, just like with the rest of it. And like I said, I’m more than happy to tell you why I chose and LOVE these oils (as if the picture weren’t telling enough) but that’s not the point of this post. And I’ve already gotten distracted by it!
Essential Oils:
Frankincense
Tummy Tuck Lotion Tut-12
So, here I am looking up the properties of Frankincense in my handy dandy Essential Oils Pocket Reference (EOPR) to tell you why it might work in this situation…but it’s not giving me anything skin related that I can think of. I put it in the cream because people were saying they were using it for all sorts of skin issues (discoloration, scars, etc.) and that it was working. So I put it in even though it’s big sells are that it is “Antitumoral, immunostimulant, antidepressant, and muscle relazing” and it’s uses are most commonly ” depression, cancer, respiratory infections, inflammation, and immune-stimulating” . So I dug a little deeper and looked in up some other references, now I’m disappointed that my Pocket Reference isn’t as extensive as I’d like, but I saw in another EO booklet all it’s skin related goodies. “Apply to aging skin, apply to cuts and scraps to help heal and reduce appearance” That last bit is what I want! All I know is it’s working for me!

Lavender
Tummy Tuck Lotion Tut-14
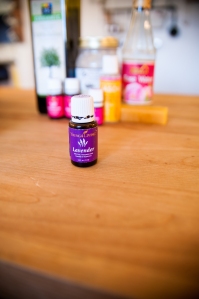
Lavender is another one of those that works for a myriad of things, but here’s what it works for skin-wise: “combats excess sebum on skin” *sebum: the fatty secretion of the sebaceous glands. Got that from the dictionary…you want the right amount, not too much…ew.* “uses: …skin conditions (perineal repair, acne, eczema, psoriasis, SCARRING, STRETCH MARKS)” again, that last bit…why it’s in there. *perineal: mommas want to know this bit…it’s what you want repairing after a vaginal birth/episiotomy *
Grapefruit
Tummy Tuck Lotion Tut-13
Cellulite. As far as skin is concerned, that’s what this is for. It also is known to be a good hair growth inhibitor. Which is part of the skin, generally speaking…so I thought I might as well mention it!
Geranium
Tummy Tuck Lotion Tut-15
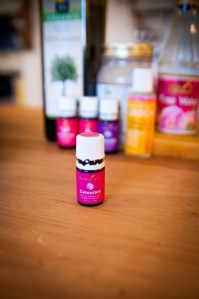
“Helps cleanse oily skin, revitalizes skin cells” and “uses: …skin conditions (dermatitis, eczema, psoriasis, acne, vitiligo)…menstral problems/PMS” And I threw the last part in since I’m reading it right now, and my main focus group is bound to be mommas with stretch marks, so they’ll be rubbing it on their belly anyway and it could have added bonuses!
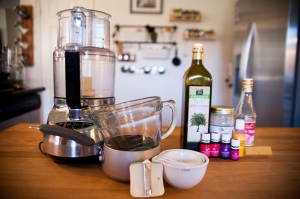
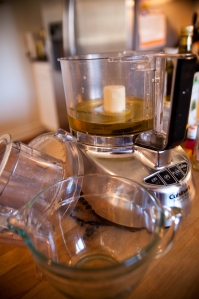
Food Processor
Tummy Tuck Lotion Tut-16
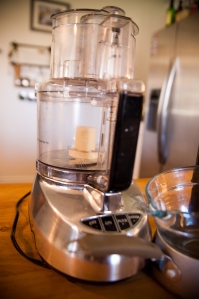
This is mine, it’s by Cuisinart and it works great for me. I don’t know that you would get the same results in a stand mixer (someone asked) but I believe in a blender or Vitamix you would. But those will be more cumbersome to clean. *Disclaimer! clean up can be annoying.*

Double Boiler
Tummy Tuck Lotion Tut-2
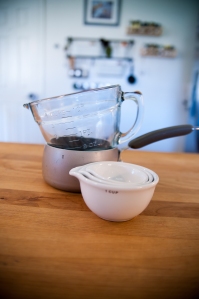
Yeah, I don’t have a double boiler. In fact I don’t know if I’ve ever actually even seen one. Even on the cooking shows that say “using your double boiler” it’s always just a bowl over a pot on the stove. So, as you can see that’s what I’ve got here. I suggest glass for this. I’ve used stainless steal for other things…but I like the glass for this. Don’t ask me why…I don’t write tutorials…I’m just blabbering on and trying to be thorough! ;0)
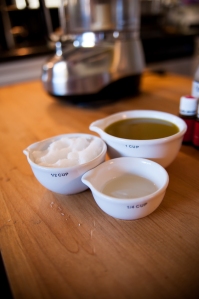
Measuring cups
Tummy Tuck Lotion Tut-4
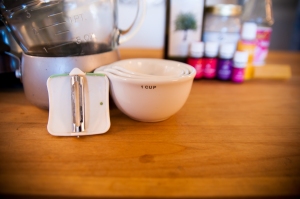
Here’s a close up, in case you didn’t catch them in the picture above ;0) I used my pretty display ones for the tutorial…because why did I get them if they’re just going to sit out and my grungy plastic Wilton ones with the melted handles and what-not are the ones I always use :0)
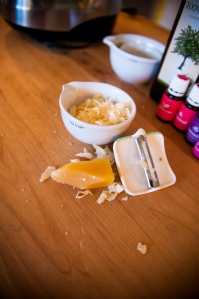
“A grater of some sort”
Tummy Tuck Lotion Tut-1-2
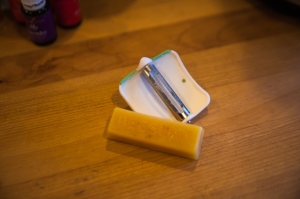
I use this Martha Stewart peeler I got from Macy’s (seriously…people will ask, thorough, remember? Trying…) its nice because you stick your finger in it and it makes it easier for me being closer to the subject I’m “peeling”. You can use anything to chop it up and make it melt-able (technical term), but it will stick forever to your cheese grater (or at least it is on mine!) and this is just what I’ve found to be the easiest.
As I am writing this (and it has taken me an entire day so far, because of the kiddos) I feel like I can hear the hundreds of people at this point saying “are we there yet?!” So yes! we are there! It is recipe time!
Recipe: (bare in mind that none of these were done to an exact science, you can tweak them here and there, you can half/double/quadruple the recipe whatever you fancy! This is just what I did!)
1 Cup EVOO
1/2 Cup CO
Approx. 1/8 Cup Vitamin E Oil
Approx. 1/4 Cup grated Beeswax
Approx. 1 Cup Rose water (I spilled some and was low so did part rose water part H2O)
15 drops each
Frank EO
Lavender EO
Grapefruit EO
Geranium EO
And here is what you do:
Measure all your ingredients (minus the EOs, you’ll just drop those in later)
Tummy Tuck Lotion Tut-20 Tummy Tuck Lotion Tut-19

Tummy Tuck Lotion Tut-18Tummy Tuck Lotion Tut-21

Tummy Tuck Lotion Tut-17Tummy Tuck Lotion Tut-24
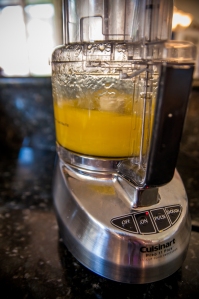
Put your oils and beeswax in your double broiler (you put water in the pot and get it simmering, then put the glass bowl, or whatever, on top of that and put your ingredients in there)
Tummy Tuck Lotion Tut-23Ā Tummy Tuck Lotion Tut-22
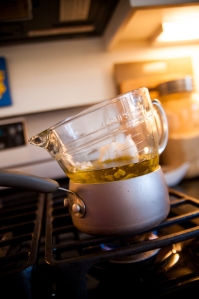
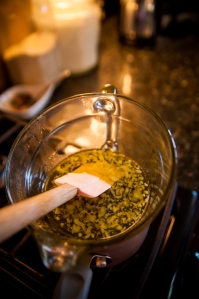
Let that melt all the way down. Your beeswax will take the longest to melt. Use your spatula (who read closely enough to noticed it didn’t get it’s own photo??) ;0) to mix it about when it looks like the second picture below you’re good to go.
Tummy Tuck Lotion Tut-25Tummy Tuck Lotion Tut-26
Pour the melted oils and wax into your food processor and let it cool in there until it’s about room temperature. Cooling in here means you don’t lose as much in the transfer. Use your spatula (see, it was important it should have been in the pictures!) to scrape every bit out of the glass bowl that you can.
Tummy Tuck Lotion Tut-27
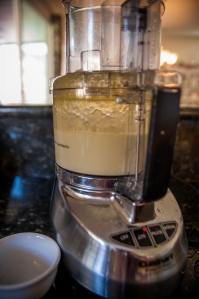
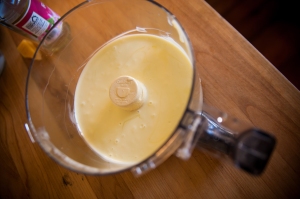
Then start ‘er up! It’ll get a little more opaque as it gets going, and I suggest scraping down the sides and off the top at least once before adding the water.
Tummy Tuck Lotion Tut-28
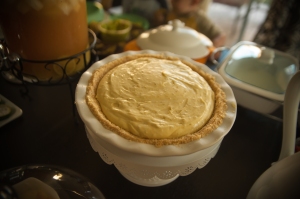
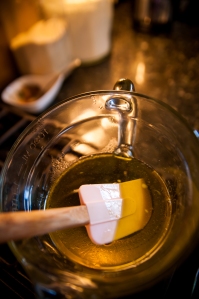
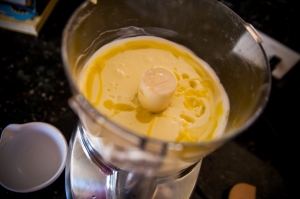
Then drizzle in your water. It will turn a much paler color. Because of the EVOO it will be a super pale yellowy hue, other oils don’t leave much color. And it is thinner with the EVOO than with some of the others I have used. The sound might have an audible change when it goes from super liquid to it’s lotiony state. But you’ll know it’s “set” when it’s this color:
Tummy Tuck Lotion Tut-29
But as you can see above there’s a lot up on the sides, so scrape that down… (poor spatula, got no love until now!) As you can see there was a lot of oil that still needed to be emulsified.
Tummy Tuck Lotion Tut-30
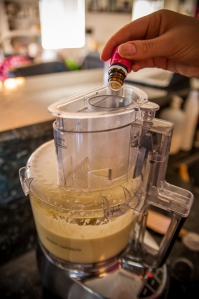
After you scrape the sides down, turn it back on and add your Essential Oils!
Tummy Tuck Lotion Tut-31
Now you’re ready to scrape that out into your jars!
Tummy Tuck Lotion Tut-32
You want every last drop of this magical cream so use that spatula to it’s fullest potential, and then any extras just go ahead and smooth out with your hands and apply immediately! ;0)
Tummy Tuck Lotion Tut-1
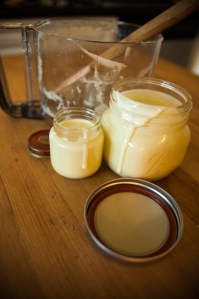
This batch made 1 pint and a baby food jar…is that 2 oz, or 4? It’s taken me too long to write this…I’m sure that’s ONE thing I can leave to you guys to figure out on your own, right? ;0) It might have taken a while…but I had fun doing it! I’d love to hear successes and see photos! Just remember to take a good photo of the “before” so the “after” is more clear ;0)
I’ve had a few people say they would rather not make it themselves…Young Living has some policies about reselling their products (they pride themselves on their scrutiny and making sure it is top-notch, so they can’t condone something being sold with their name they don’t have control over testing-wise etc.) so if you are one of those people who wants me to make it for them…I’m still trying to figure out how it can be done with YL, so you can message me privately and I’ll let you know when I know!
Hope that helped with all the inquiries!

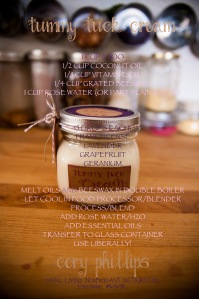
Update: an easy recipe graphic I made you all!

TTCream fancy jar INFO GRAPHIC
To order Young Living essential oils go here.

Put the Lime in the Coconut

Let’s kick this thing off with a tutorial for the inspiration behind the name! Lime and coconut sugar scrub!

Image

This is a super easy thing to make. And if you’re here because you read my post over here, then you’ll see what I mean in a second!

Ingredients:

Lime Coconut Sugar Scrub-no mark-5

Organic Sugar

Organic Unrefined Coconut Oil

Lime Young Living Essential Oil

That’s it. Yup. Like I said, super easy!

So Let’s meet our ingredients! All three of them.

Organic Sugar:

Lime Coconut Sugar Scrub-no mark-1

If you didn’t read this post, then you don’t already know, so I’ll mention it again: I love Whole Foods. I buy everything there. From apples and flour to shoes and make up. It’s my go-to for absolutely everything I need that I want organic and all natural. So, you might have guessed it, I got this big ol’ bag of sugar at Whole Foods.

Why organic, do you say? If you have to ask, you’re in the wrong place. I always choose organic, and I do my best to choose the best organic option available. When they were out of my usual honey (yes, at Whole Foods) I had to sit in the freaking baking aisle (where they keep the honey) for half an hour reading each label in full detail. Wild? Humanely raised? Organic? Raw? AHHHHHHH! When I’m not at the farmer’s market, teaching a craft class for my 98-year-old grandmother’s senior living home, making everything from scratch, or dancing, shuttling, cuddling, cleaning, chiding, and loving my three kids, my husband and sometimes my nephew, then I am spending my leasure time reading…in the Whole Foods aisles.

If you don’t have a Whole Foods I feel bad for you, but you can find organic sugar at any health food store. Even Target has some.

What is the sugar good for? Exfoliation. This is a sugar scrub. It scrubs off your dead and dying skin…I assume. What else is it good for? I don’t know…makes it smell sweet? It’s better than rubbing sand on your body? I’m not clever enough to know if it has a higher purpose in this recipe, so lets stick with exfoliation.

Organic Unrefined Coconut Oil

I’m really beginning to sound redundant here but for those wanting to know where I get my coconut oil (because there will be those that ask) WHOLE FOODS! Shocked, I know.

Oh geez…now I have to explain why unrefined…refined stuff is gross. I’ve read this, I’ve read that, I make my decision and immediately forget the rest. Saves space in my brain. It has enough to remember without why unrefined. If you’re looking for all these technical answers, you’re not going to find them here.

Last but not least!

Lime Essential Oil

Lime Coconut Sugar Scrub-no mark-4

Why lime? Because it smells like a margarita. Oh sure, there are other benefits (like: it is antirheumatic, antiviral, and antibacterial. And it’s uses are: skin conditions (acne, herpes), insect bites, respiratory problems, decongests the lymphatic system ) but lets face it, I used it because I rub this all over me and it’s like I’m under a waterfall in the tropics sipping on a delicious margarita. Ok, maybe not that dramatic, but it does smell awesome.

I keep mine in a little mason jar in the shower and scrub on up before I wash my body. It leaves my skin super soft and smooth. I even rubbed some on my face this morning, and it felt silky smooth after!

See? Much easier than the other tutorial I did!

Disclaimer: Yes I guess I “sell” the stuff, so you may be reluctant to trust me when I say you definitely want to use Young Living Essential Oils but I love the oils, and all the products I’ve tried. And I have never had results (smoother skin, etc.) with any other essential oils. And let’s face it, I’m not going to say no to money just for having people put my info in when they buy it for themselves. I do have a serious Whole Foods habit to support after all.

So grab your EOs and put the lime in the coconut, it makes your skin better ;0)

To order Young Living essential oils go here.